HOW TO HANG WALLPAPER
Tools you will need.
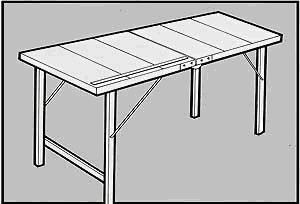
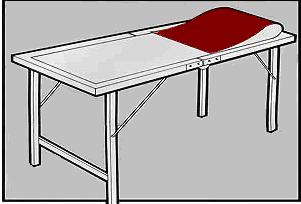
1. Pasting table.
2. A 9 inch roller or 5 inch paste brush.
3. 2 x Buckets (One for the mixing of paste and the other for clean water.
4. A sponge.
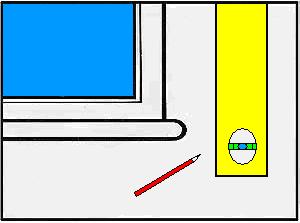
5. Spirit level.
6. A pencil.
7. Scissors with a long blade.
8. Snap-off blade knife.
9. Paperhangers brush or caulker.
1. Getting Ready.
Before you even think about looking at your wallpaper you need to have done these things first. Prior to removing any protective wrapping, and cutting any wallpaper, make sure the rolls have the same reference, shade, batch numbers and that they are as ordered. Then complete painting of all woodwork and ceilings – it is easier to wipe paste from paint than to wipe paint from wallpaper!
Strip any old wallpaper from the wall completely – check walls are sound clean and dry. Never hang wallpaper on a damp wall. Fill in and smooth any cracks or holes. If hanging onto new plaster, 'PRIME' the wall – this means apply diluted paste containing a fungicide and allow drying – the instructions for this are on most paste packets. Allow the 'PRIMED' wall to dry completely.
2. How to cut paper.
It’s best to cut several lengths before pasting.
To each full length (this is the height from skirting board to ceiling) add 4”-5” If using a design with a pattern repeat, allow enough extra length on each piece to ensure that the pattern matches in sequence. Roll up any cut un-pasted lengths and number them to avoid mistakes.
3. Where to start and finish (DEPENDIND ON THE PAPPER).
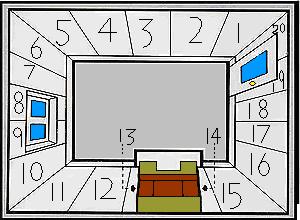
Start at the corner (1) behind the door move round the room keeping the pattern going along all the walls until you get to the corner behind the door (20) we will lose the pattern here, the pattern will be hidden behind the door as it opens. Also you could start from both side of the window edges and move away towards the door try working out what would suit the paper as well as you.
4. Getting started.
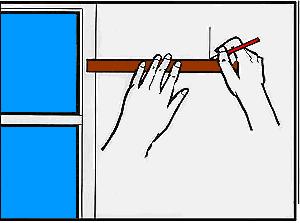
The key to a perfect finish is to hang your first piece of paper perfectly straight. Measure the width of paper less ½”, from the centre of the window frame and mark the wall.
Unroll your first piece of paper on the paste table face down. If using pre-pasted wallpaper you will need to wet the paper with a sponge
Align with the edge of the table allowing for very slight overlap to keep paste off the table.

Load brush or roller with paste and wipe off surplus on edge of the bucket. Paste evenly down the centre length of the paper. Brush out towards the edge. Pull pasted part to overhang front while you paste the rest.

If using a pre-pasted paper, then immerse in water and soak as per label instructions. Then follow the next steps:
Fold in half the end, which is to be at the bottom of the wall, paste side to paste side. Then fold the top section to the middle. Leave to soak as instructed on the roll label.
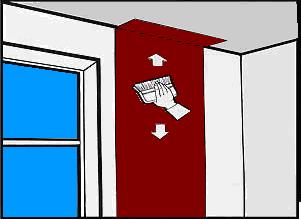
Take hold of the top corners; press the paper to the wall, starting at the top angle of wall and ceiling (allowing 2” for overlap). Slide the piece to meet your pencil line. Smooth down the middle of the paper with a wallpaper brush, using up and down motions only, do not use side to side motions as this will stretch the paper, so when the paper dries this will leave gaps between your “butt joints”. Open the bottom fold and continue smoothing.
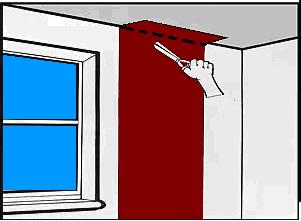
Run the knife or scissors along the angle of the ceiling. Peel back if using scissors and cut along the crease line. Smooth into place. Check for and smooth out any air bubbles.
Then hang the next length matching the pattern and making a good butt join– this is where the too pieces meet and do not overlap, but instead butt together. Immediately wipe off any excess with a damp sponge.
Repeat the process as you move round the room.
Wallpaper Tips.
1. Wallpapering around corners.
Corners are never exactly vertical. Always hang the paper in two parts when papering into a corner. Measure from the last piece hung into the corner in about 3 places. Cut the width of the paper to the largest of these dimensions and add about ½”. Hang and trim this length smoothing paper around the corner. Ensure edge butts exactly against the piece already hung without overlap.
Mark a new plumb line vertically- but to fit the width of the remaining piece of cut paper. Hang the right side to the plumb line. It will of course overlap in the corner – but discreetly.
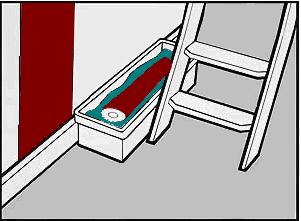
2. Papering window recesses.
Follow the order show in the room illustration when papering into a window recess. Allow small overlaps where the dotted line indicates. Cut a special length for piece 4 with enough for a small overlap at the front and side, which is tucked behind piece’s 1 and 4, (for vinyl papers you will need to use a vinyl to vinyl adhesive.

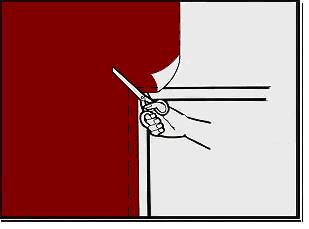
3. Papering round a door.
Paste and hang a full width. Cut away surplus to within 1” of the frame edge. Cut diagonally at the top corner. Push the overlaps top and side into the edge of the frame with your brush. Mark with the back of knife or scissors, pull back and trim to the mark, then smooth back.
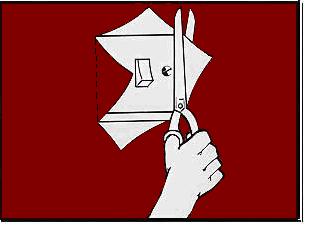
4. Switches and sockets.
The power supply should be switched off. Then paste down over the obstruction. Push knife or scissors through paper at the centre of the switch socket and cut diagonally to beyond the corners. Fold back, score and trim. Smooth down. If you prefer the flaps can be trimmed but leaving ½” to tuck behind the switch plate, after loosening the screws.
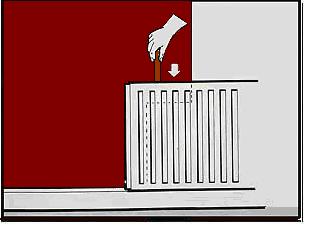
5. Radiators.
Cut away the surplus so as to leave 6”-9” for tucking down behind the radiator, top edge first, then the sides. Use a stick, wrapped and padded with cloth, to smooth the paper into place behind the radiator.
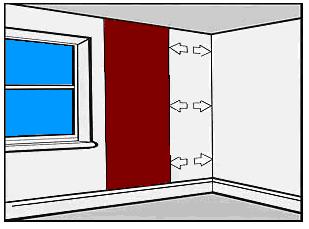
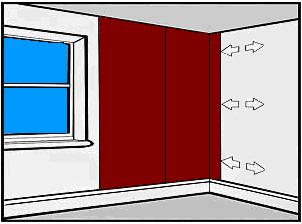
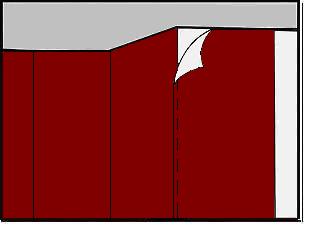
6. External corners.
In the illustration below, hang piece number 1 to fit to the edge of the external corner. Cut piece number 2 to jut beyond this corner by ½”. Fold overlap around the corner when hanging.
7. Other useful tips.
Tie a refuse bag to the edge of the paste table to hold all those small sticky off-cuts.
Ensure your hands are clean at all times. Grubby fingers can leave marks when they are wet with paste.
Don’t worry if the paper bubbles slightly after hanging – it will usually dry flat. The drying process is dependent upon room conditions. It’s best not to overlap papers, except into the corners, and at those points an overlap adhesive should be used.